Overcoming Bull-headedness.

Bike sketch in brown ink by Jon Tremlett ©2013

For those of you who have been following the saga of the large biro drawing, known around here as “The Bull”, you will note that todays offering is not it, it’s something else, something a little different. Why? Well to be honest with all of you, I’m having a bit of a battle with it, and as a consequence it remains unfinished. I’m beginning to wonder who the bull really is. It is truly the drawing or perhaps it’s me, as I find myself repeatedly charging full pelt at a gate which is refusing to give way. A concerted effort last week to resolve the impasse bore nothing but a large pile of scrunched up tracing paper, wasteful certainly, and enough to provide bedding for a hamster for about a year. I have since decided to leave it alone for a while.


Having got utterly steamed up about it, backing off and calming down has led me to realise that this conflict is nothing new. It is one of the uncomfortable truths that surround any creative process. It is certainly not unusual to find oneself completely bereft of ideas during a concept design phase in the studio. Having “brain dumped” for several hours in a morning it is not a surprise to find out that your mind is totally empty and your imagination has gone walkabout. The energy previously expended in generating new ideas gets refocused into frustration and before you know it you’ve got a nice little vicious circle going.  Backing away, doing something else for a while unblocks the pipes and lets things flow again. So for now the drawing is sat on the other side of the room, the recipient of the occasional glance but nothing more. It will come to me when it’s ready, but probably not before.


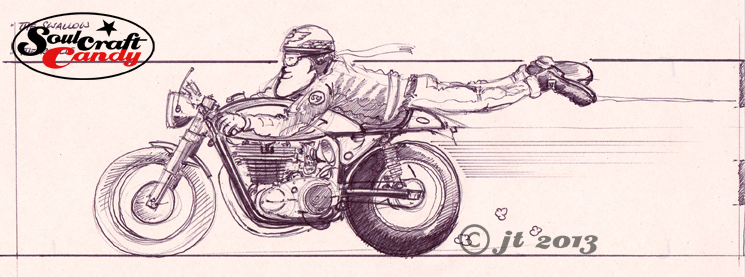
So what’s with this brown thing? Well, it’s a sketch I made a while back, always good to have a back up plan for a post if things go awry, whilst playing with the idea of drawing in other colours. Being a sucker for a cheap pen I’d purchased a tasteful set of biro pens in assorted colours and was intrigued by what they might bring to the party. Initial scribbling revealed that some of the colours, yellow in particular, might not be strong enough, but the brown showed immediate promise. You may remember the cartoon of the authentic biker a while back, that was done with this pen. The basic pen itself gives the drawing a lovely aged feel but it’s a bit limp when it comes to creating good contrast. As luck would have it I’d also found a brown gel rollerball pen, which when used with the biro gives a degree of heft to the dark bits and lends the whole thing a much needed punchiness. This is very much a learning exercise but one that worked out well. Now to get my hands on some cream coloured paper and find out where I can get brown biro refils without the need to buy a whole set when it runs out, which it will, soon.


Alive and kicking.

Soulcraftcandy work in progress

It is probably very different for those who can maintain the discipline of posting to their blogs every day, but for the rest of us, who invariably post when we can, gaps appear in our flow and by the time we have seen them it is too late to close them up or fill them in. Such is the way of things. When posting relies quite heavily on making progress with a project or piece this is something you pretty much have to live with, cope with and try and overcome through trying just a bit harder. So, gaps are awkward but not the end of the world. My posting habits are erratic at times but this does not mean that nothing has been going on in the background.


Following the last post, showing the journey from blank sheet to finished picture (see below), work has continued on that small series, sketching out, drawing up and starting colour work on the last three images that will take me to the complete set of nine that I want. In the photo above, taken today in the mini-studio, you can see two of these remaining pictures. In the foreground is number eight just over half way through with most of the inking in done and only bike colour and background to finalise. Number seven, in the top left, is all done and only awaits a background block and final fiddling. I will of course post them up as they get fully finished. I thought this shot would also be useful for the fact that you can clearly see my technical pens lying next to the picture, which gives you a clear sense of the scale I am working at with these. Small.

Soulcraftcandy ideas and sketch wall..

This second shot shows the current state of my ideas wall. I am trying to develop the habit of changing it’s contents a bit more regularly though doubtless some of what you can see will appear very familiar to those who have been following the blog for any time. On the right hand side though you can see evidence of what has been occupying my blog-time of late. I have been getting some of the drawings ready for printing as small cards with the intent of selling some through the Soulcraftcandy BigCartel store. The top row shows some run-offs of the first set from the original Cafe Racer series done last year and below them are some prints off the home printer looking at how best to size these newer images for their own card set. Getting all the files clean after scanning, colour balanced and nice and crisp takes a good deal of time but hopefully the results will be worth it. So there is lots happening and I will be reporting on progress as the journey to print continues.


If you spotted it and guessed correctly, yes that is a picture of one of the cats at the very bottom of the shot, but fear not, this blog is not about to be overtaken by feline inspired craziness.


From blank sheet to finished picture – part 1.

With five of the small Cafe Racer colour pictures done and posted there is one left to do which will complete this set. Rather than merely post up the final finished version of it I thought it might be interesting for people to see more of the process I go through when creating these images. So for this one I’ve scanned the various stages as I complete them.

Norton_biro_1

The first step, once the overall composition had been decided, happens on the newsprint pad where I rough out a couple of sketches to get a feel for what I’m after. Often this involves sketching it out a couple of times as in this case. The first sketch is really just  about working out the proportions, rider position and the general look of the bike in the image. Once you’ve got something then you’re in a position to make changes as you see fit.

Norton_biro_2

So with this done, I decided that I wanted a slightly different looking bike and to move the rider up the tank a bit, good reason to do another sketch. I wanted to base this drawing around a twin cylinder Norton and a quick search on the net yielded the right picture which could inform me about engine details and other bits and bobs. I can now start to work these into the drawing.

Norton_pencil

With these two sketches done there is enough information on the sheets to allow me to transfer the image onto the A4 Bristol Board for the final version. This is where my handy little light box comes into its own. If there is a need to blow up or reduce the sketch size for this stage then it is simply a matter of printing out a quick scan at the right size before hitting the light box. For the pencil stage I need a good point to the pencil so use a 2mm leaded technical push pencil, with an H grade lead, which keeps a point well and isn’t so hard as to leave big grooves in the paper when you erase it. Most of the drawing is done freehand though I resort to my ellipse guides to get the wheels nice and tight. At this stage I’m building in all of the details gleaned from reference pictures like the engine case shapes, cylinder head position and brake details. I love density in these drawings so put a lot of effort into distorting things slightly and filling in all of the big gaps that normally exist when looking “through” a motorcycle. It’s also a good time to get all those tiny details in. I don’t necessarily need accuracy here but I do like things to be reasonably believable, if that makes sense. With the bike and rider done, I loosely put a box around it which will approximate the background block. By the time this pencil layout is done, my mind has already started to think about what colour to paint the bike, the riders helmet design and the background colour. Time to get the brushes out and a look at the various painting and inking in the next post.